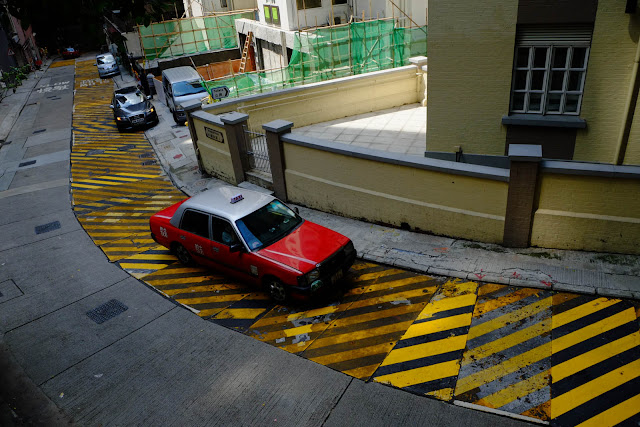
Leo's Fuji XE-1
 |
| Fuji XE-1 JPG |
 |
| Fuji XE-1 RAW |
This post is only comparing the out-of-camera JPEG vs the out-of-camera RAW. The Jpeg was shot with film simulation set to Valvia and nothing more; default color, sharpness and everything. DR was set to 200%. Leo didn't supply me with the manual and I was too lazy to look for it online, thinking I would be able to figure everything out. Whatever the 200% means, I was setting it between the available 100% and 400% settings. The RAW was converted using Lightroom 4 default settings. On the computer screen, the two files looked like, well, two different files. I mean it could have been taken by 2 different cameras! Somehow after the conversion to Jpeg for the web, the difference isn't that obvious, but still obvious enough to see the difference (oops!). Looks like the red car (a taxi) just got a fresh coat of paint in the Jpeg version!! It is not just a push on the saturation slider -- if I were to mimic the Jpeg file, I'll have to juggle with a few sliders in Lighroom in order to get similar effect.
Final word, taste is a personal trait. The RAW file definitely give more shadow details, and I would say, much more constrained. Put it this way, if I were to buy this camera (a very good may), I wouldn't should Jpeg only. May be after I try out different setting, I may change my mind -- there are other film simulations I haven't tried.


Comments
Post a Comment